

If you or your clients are film fans, cosplay crazy, Disney holiday-goers or simply love sentimental or seasonal nail art, bring your favourite characters to life on nails with expert advice…
Beginner level
“Simple colour palette characters, like Mickey Mouse or Betty Boop, are great for beginners to create,” notes Emma Laverton of Fáilte Fae, Aberdeen & Glitterbels ambassador. “Breaking characters down into geometric shapes can make the creative process less overwhelming. For example, Mickey Mouse is comprised of three black circles, then an oval with tall bunny ears for the lighter part of his face.”
 Devon-based Lecenté creator, Amanda Trivett, agrees, adding: “Beginners should keep it simple by creating 2D figures on nails. The older Disney characters make a great starting point. As they are two-dimensional, they require line work rather than complex shading.”
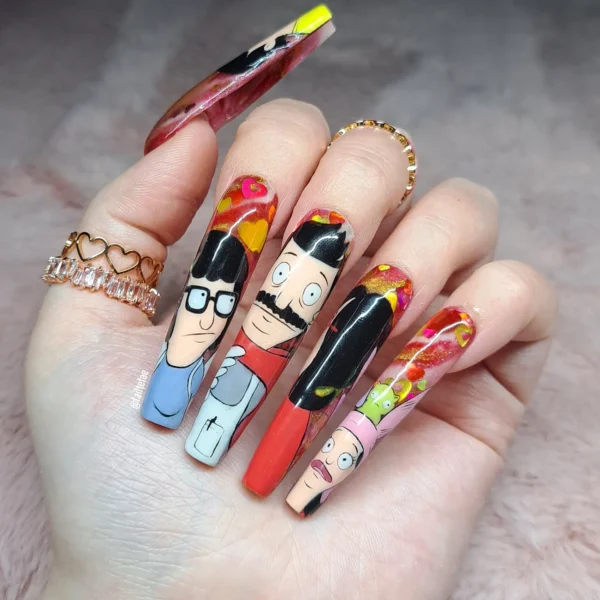
A Bob’s Burgers nail design by Emma Laverton.
Advanced level
 “Shading and highlighting take character looks to an advanced level,” reveals Melanie Garlick of Haus of Cruelty Free Clawz, Lincolnshire. To achieve great shading, the pro recommends taking your chosen shading colour and blending it with a base coat to make a thinner version of the colour. “Use the same technique for highlights, and apply a pure white shade in small areas for a more intense highlight,” she says. “Once you have mastered cartoon style characters, you can transfer your skillset to create portraits.”
Planning your design
 “To be a great character nail artist, you need to be able to copy reference images well from paper or a screen,” reveals Michelle Brookes, award-winning Doncaster educator & Scratch online columnist. “With a digital image, zoom in on the picture so that you can see what fits the nail, and divide into four equal parts using editing software. Following the application of base coat, divide the nail into four lightly using a pencil and transfer the outline in each corresponding part of the image onto the nail.”
 “When planning your design, be aware that nails are curved, so some of the look could get ‘lost’ down the sidewalls,” notes Vicky Bancroft of Greater Manchester business, Nails By Victoria B & NSI social media advocate. “I avoid this issue by focusing on the main elements of the characters I am painting, for example the key facial features that make them recognisable, as opposed to ears or hair.”
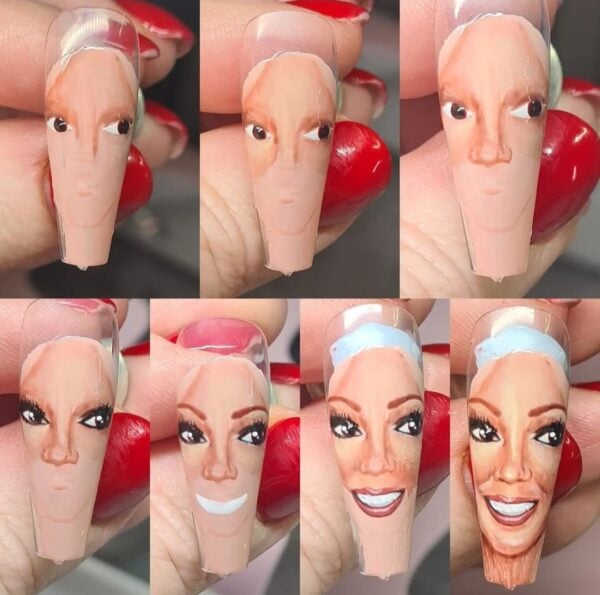
Vicky Bancroft shares how she built up shading and highlights to paint a Mariah Carey portrait.
3 application tips
1. “Master line work, in particular the creation of thin, clean lines for outlining characters. Your lines will become thicker or uneven if a ball of gel builds on your brush, so practice twisting and pulling your brush through the gel to give it a well-loaded but thin coat of product. Next, work on the pressure; the less pressure you use, the thinner your line.” – Melanie Garlick
2. “Play with colour and create custom mixes if required. This will make it easier to create exact colour matches and ensure your designs are true to character.” – Laura Chree of Scottish business, Chreeative Nails & Artistic, Famous Names and Footlogix brand ambassador for Sweet Squared
3. “Use your chosen top coat to blend colours for a more realistic finish. My character work totally transformed once blending clicked for me.” – Emma Laverton
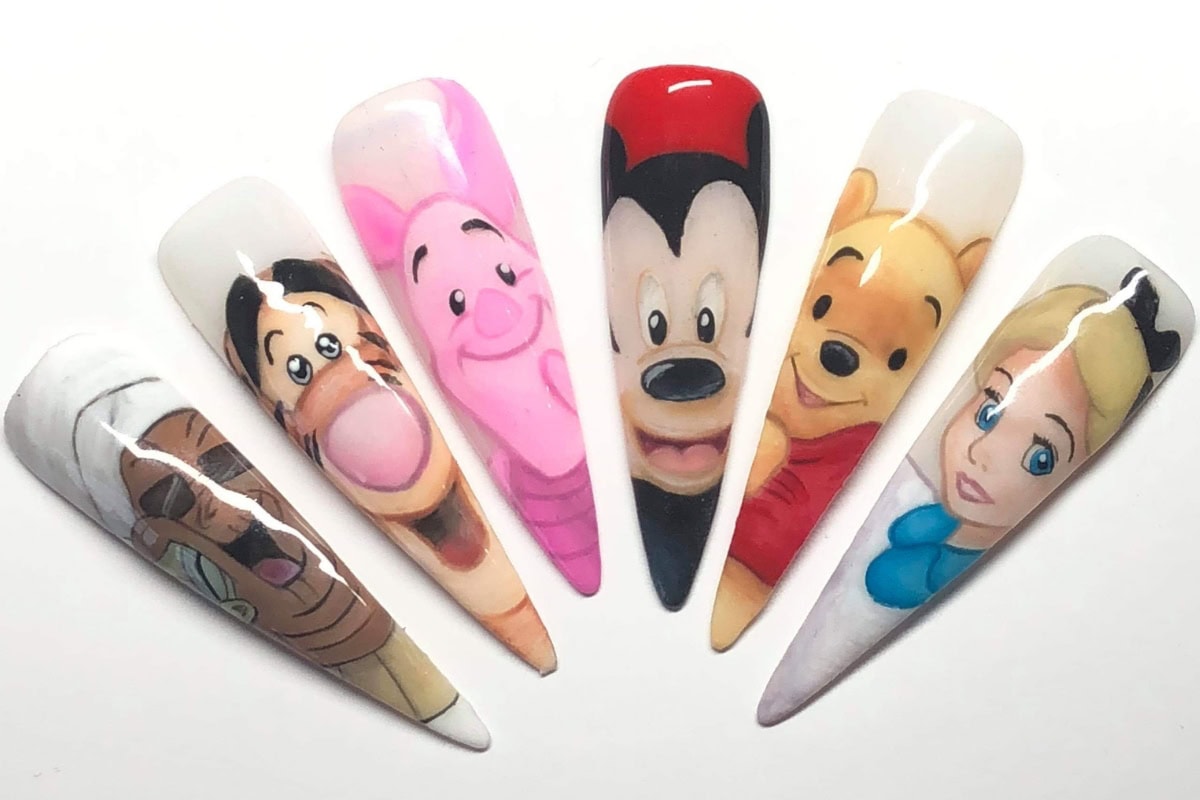
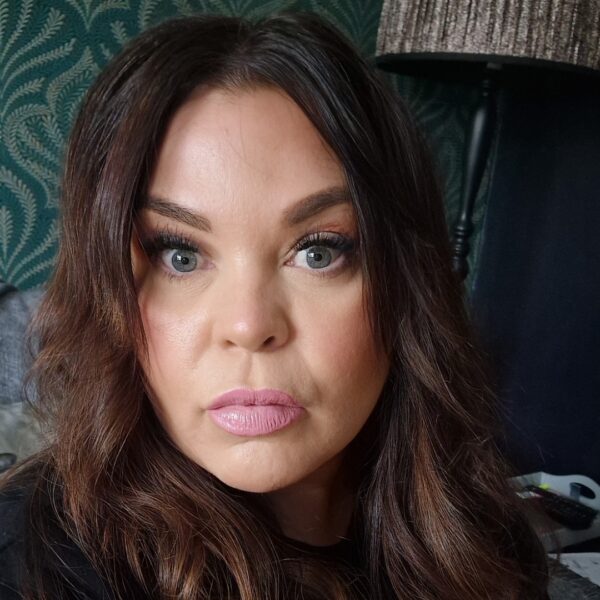
Cover image by Light Elegance educator, Leila Monroy.